I spent last week on the island of North Haven in Maine's Penobscot Bay, and while there are any number of delicious things to eat there — Nebo Lodge's sesame ice cream with orange blossom caramel sauce, for example — I'm going to kick off the first in an occasional series of posts about it with one of the less obvious: its trees.


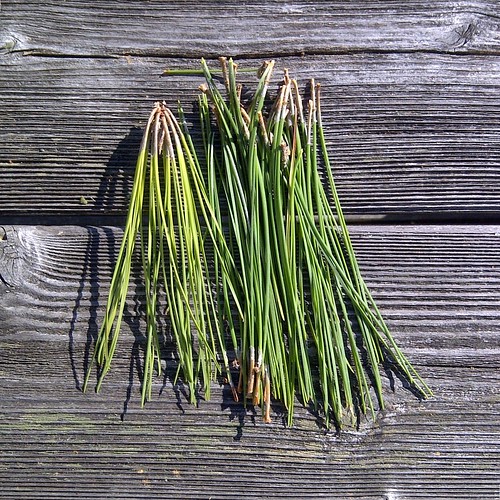
I haven't (yet) done enough comparative tree-eating to tell you which ones have the best flavor, but I did at least identify the particular tree that caught my eye one morning as a young Norway pine. I think. I'm far from being a tree authority but I felt satisfied that, even if my ID was a little off, I wasn't consuming anything poisonous; there are more than a hundred species of pine and it's my understanding they're all edible. Please don't go munching on a yew or somesuch without consulting a reputable guide! Some trees contain toxins you shouldn't be snacking on.
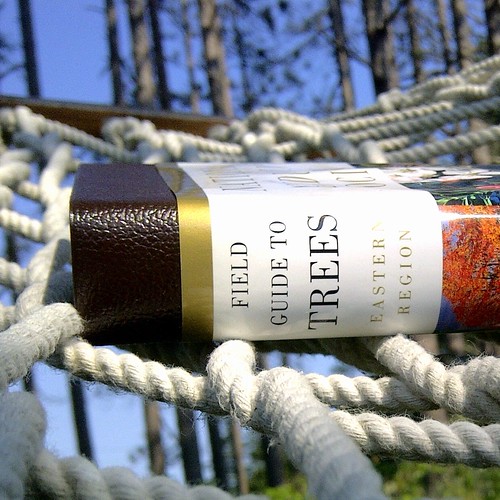
My Audubon Field Guide to Trees: Eastern Region is very helpful in letting me know what I'm looking at, but it doesn't have anything to say about deliciousness. If you've got a favorite guide to scenery-chewing, please speak up in the comments section.
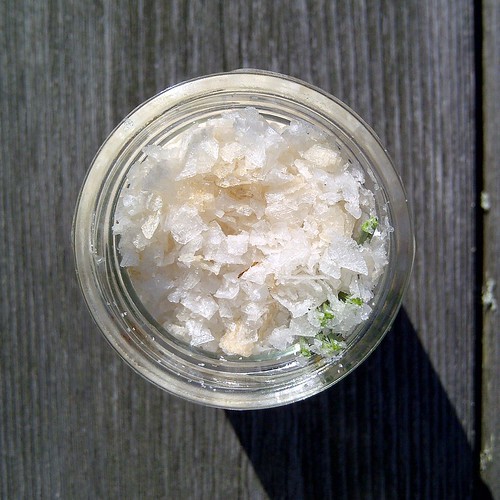
My first little project was to make some pine-smoked salt. I have a small stove-top smoker at home but it's easy enough to improvise a similar arrangement, even in a rented cottage's kitchen. All you need is something to suspend your salt (or whatnot) over your source of smoke, and a close-fitting lid to keep the smoke in. A metal steamer basket is ideal. I made a little salt-tray out of foil, but if you can find a dish or plate that fits nicely, go ahead and use that. Try to be a little neater than I was about folding down the edges of your foil, if that's what you're using, so that the smoke can evenly do its thing. You'll want to arrange whatever it is you're smoking in a shallow layer, such that all of it is exposed to the smoke you'll be flavoring it with. I also recommend tightly covering the lid of your set-up with foil. Otherwise smoke will inevitably seep out around the edges, and your fellow vacationers might be tempted to rub their irritated eyes and ask what you're burning.
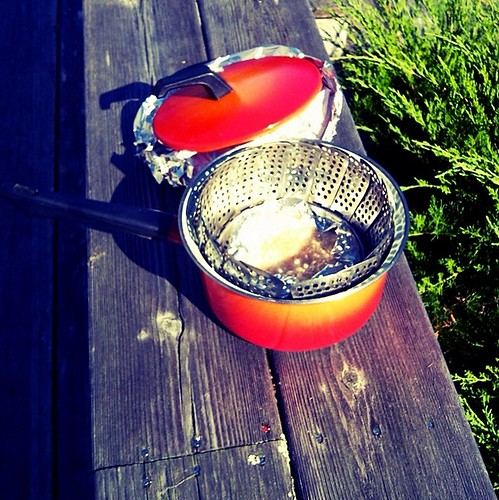
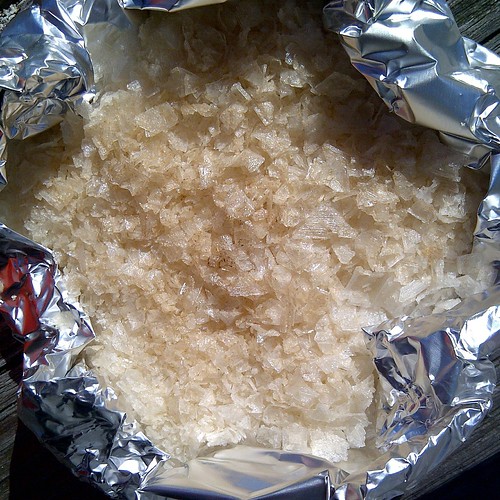
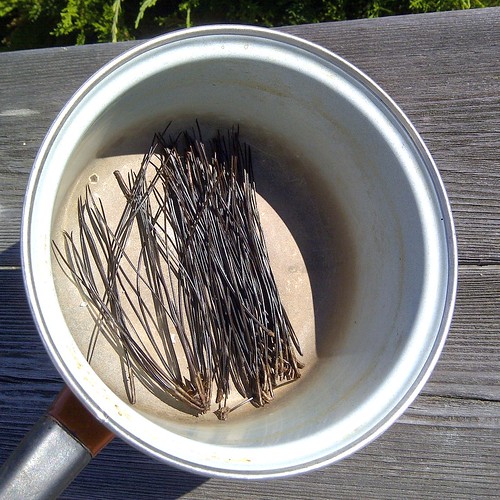
I put a handful of pine needles in the bottom of the pot, arranged the steamer basket and its contents over them, and set it over a low flame for approximately 25 minutes. I've made several different kinds of smoked salt at home using wood chips — cherry and applewood are my current favorites, though I'm eager to get my hands on some allspice (pimento) wood, as is used to prepare Jamaican jerk chicken — and I've found that 25 to 30 minutes is usually perfect, but there wasn't quite as much tree flavor in this salt as I wanted. Rather than covering it back up and smoking it longer, I added a few fresh needles to the jar I'm keeping it in, snapping them in half so as to expose more of their essential oils. This did the trick. I started with Maldon salt because it's my favorite, but you can use any type of sea salt you like.

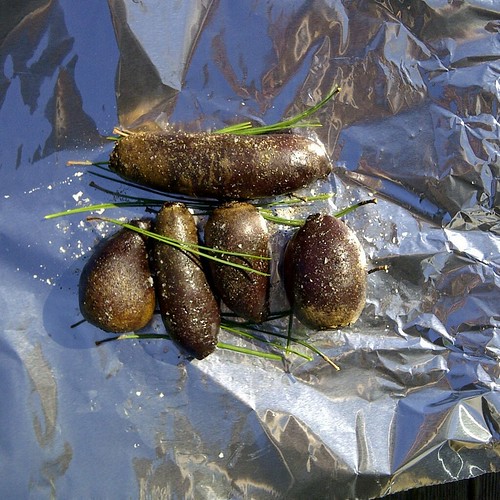
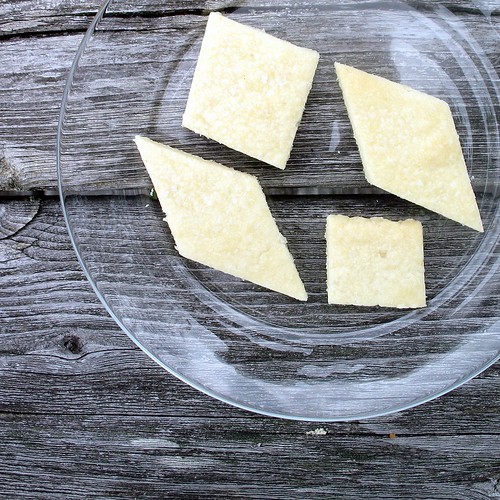
If you're curious as to what your tree parts ought to look like afterwards, they'll probably look something like this:
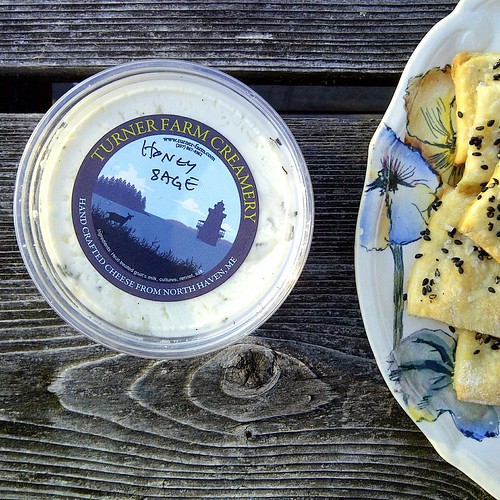
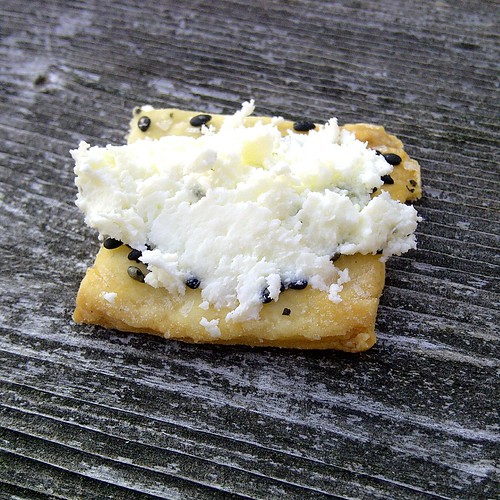
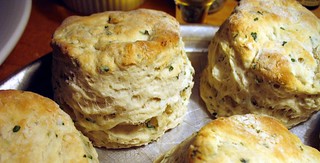
I made good use of the salt while we were there. One efficient and instantly gratifying little carrier of its flavor is homemade crackers. I seldom make them at home — the repetitive process of rolling them out as thinly as they should be and baking off batch after batch is pretty boring — but it's no coincidence that I made crackers during last summer's visit to North Haven too; the terrific cheeses made on the island by Turner Farm's creamery are demanding in this way. I'm going to hold off on telling you about last year's cornmeal crackers until I can find my recipe for the crabapple chutney I made to go with them, but the recipe for this year's buttermilk crackers with black sesame seeds and pine salt is below.
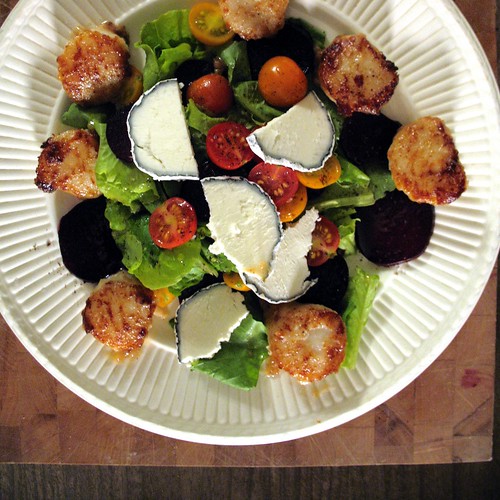
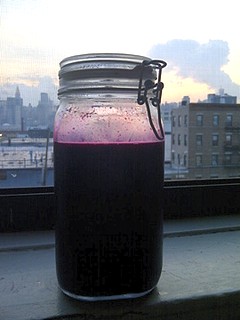
The salt also made an appearance atop some pine-roasted beets, both before and after cooking. I should've added more needles to their foil packet but they did nonetheless manage to take on a bit of tree flavor during the process, and were thoroughly enjoyed in a big salad with lettuce and cherry tomatoes from our rented house's garden, Turner Farm's Sparkplug (an orb of aged goats' milk cheese coated with vegetable ash), seared scallops, and maple dressing (a simple vinaigrette of dark maple syrup, apple cider vinegar, olive oil, s&p). A 90s-ish salad, but sitting in front of the fireplace eating it, that was not on my mind. The beets came from Turner Farm too, and I was happy to encounter their cousins later in the week, at the very pink bottom of a pickled beet martini at Nebo Lodge. I can't drink much these days — my doctor has limited me to three a week, which is every bit as tormentedly inadequate as it sounds — but if I could, I'd definitely have experimented with drinking the tree as well. Last summer I had a successful go at drinking the garden's tomatoes, a simple matter of infusing some gin with their stems. (Sniff carefully and I'm sure you'll agree that it's the stems that carry the most sun-warmed-garden-tomato fragrance, not the fruit).
Turner Farm is an organic farm on the island owned by Congresswoman Chellie Pingree (D-Maine), who's been farming on North Haven (among other things, obviously) since she graduated from college. The farm itself has been a farm for over 200 years. They've been operating a creamery since 2010 and the milk for their cheeses come from their own herd of Oberhaslis goats. They also raise pigs, chickens, cows, and turkeys. They supply the Nebo Lodge, naturally, and operate a farm stand, in addition to selling their goods at North Haven's seasonal farmers' market. (There are several other farms on the island, of varying sizes). If you think it sounds like a ridiculously idyllic place to shop for vegetables, you are correct.

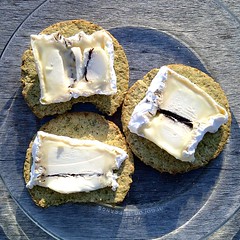
As delicious as the Sparkplug was in our dinner salads, my favorite cheese of theirs is the Whitecap, an aged goat cheese with a layer of local dulse seaweed in the middle. It's a little briny, it feels like the most appropriate cheese imaginable to eat while watching the sun disappear behind the Camden hills, and like their other cheeses, it's perfectly ripened.

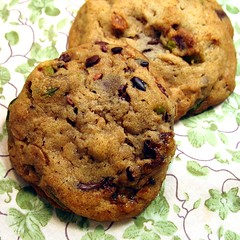
But back to the tree-eating. My next project was pine shortbread cookies, and I started by infusing some butter with a handful of needles. Not nearly as many as I ought to have used, apparently, because the finished cookies didn't taste as strongly of tree as I wanted them to. I could have — and definitely should have — added more needles, and maybe even let the butter become browned, but for complicated reasons, I didn't. Instead I let it infuse for half an hour or so, strained the needles out, and put the butter back in the refrigerator to chill. It's hard to find the right balance when it comes to incorporating trees into one's diet. I bought a jar of pine honey years ago that was so strongly flavored I found it nearly unusable, and I'm sure it's still in my cabinet somewhere. (It's nice drizzled over suitably-strong cheeses, but I don't eat those nearly often enough to make much progress using it up). It's probably for the best that my cookies were under-piney rather than over- because they were extremely edible. The recipe is below, and by all means, use my photo as a reference: it needs more tree.
Buttermilk crackers with black sesame seeds & pine-smoked salt
Adapted from this recipe from Nancy Silverton's Pastries from the La Brea Bakery, with very minimal changes. The original calls for unsalted butter, but I love salt so I use salted for nearly everything. There are hundreds of thousands of other cooks who will tell you that using unsalted butter "gives you more control," but if you know from experience how salty your favorite brand of butter is, you haven't lost any control. So use what you like.
Makes several dozen crackers, with the precise quantity depending on how thinly you roll them out and how big you cut them.
2 tablespoons sugar
3/4 teaspoon baking powder
1/2 teaspoon or so pine-smoked salt, plus more for topping the crackers (see instructions above)
1 stick plus 2 tablespoons butter (5 oz.), diced into cubes and chilled
1 1/4 cups buttermilk, plus a few more tablespoons
black sesame seeds (or beige, if you prefer)
Combine the dry ingredients in a large bowl (break the salt up with your fingers if it's flaky like my Maldon) and, using a pastry blender or a couple of knives, cut in the butter until the mixture resembles cornmeal. (You can do this step in a food processor if you like, but I'm not sure it's worth dirtying it up for such an easy task). Stir in the buttermilk until thoroughly combined. You'll have a sticky dough. (I like using a silicone spoonula for tasks like this). Lightly dust your kitchen counter and your hands with flour and knead the dough for a few moments, until it comes together in a ball. Transfer it to a clean bowl, cover it tightly with plastic wrap, and let it chill for a few hours. (I stuck with Ms. Silverton's instructions on this point because I wasn't in a hurry to bake my crackers, but I'm not sure how essential it is; my feeling is that an hour would be sufficient).
Heat the oven to 350° F. Dust the counter with flour again and, working in batches, roll out the dough. It should be thin, approximately 1/16". You can roll out and bake off however many crackers you like at a time but I think they're best when freshly made — I recommend cutting the dough into four equal pieces, and working with one or two at a time depending on how many cracker-eaters you've got. (The rest of the dough will keep well in the refrigerator for a couple days). Transfer it to your baking sheets using your rolling pin (a little more flour on top is helpful here), and slice it into cracker shapes using a small, sharp knife. (You'll do the actual separating later, after they've baked). Lightly brush it with a thin layer of buttermilk and scatter the smoked salt and the sesame seeds over the top. Gently pat them down a bit to help them adhere.
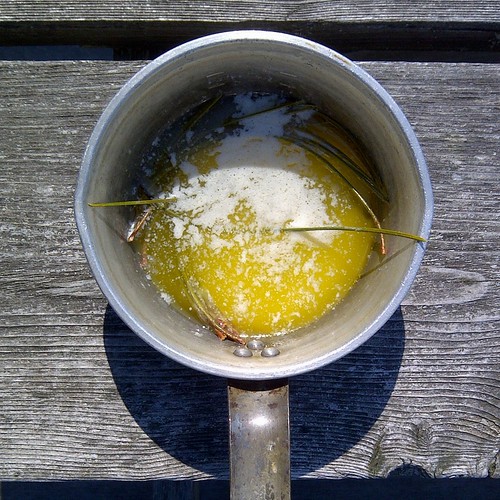
Put the pine needles and the butter in a small saucepan over low heat. Once the butter is melted, turn the burner off and allow the mixture to infuse for at least 30 minutes, preferably closer to an hour. Strain the needles out, pressing on them as you do to extract every bit of tree flavor, and chill the infused butter until shortly before you're ready to bake. (It will keep for a few days, tightly covered so as not to absorb other flavors from the refrigerator, and I'm sure it freezes as nicely as plain butter does).
_______________
Cross reference: I've blogged about the non-edible parts of North Haven a few times over on my other blog. Here and here, for starters.
Bake the crackers for approximately 30 minutes, using the upper and lower oven racks and rotating the pans at the half-way point. Let them cool before breaking them up.
Norway pine shortbread
Makes approximately two dozen small cookies.
Norway pine shortbread
Adapted from this Food & Wine recipe for "Granny Wallace's Shortbread Cookies," which I was curious about trying due to its high proportion of corn starch. I was very happy with the delicate, fine-grained texture of the finished cookies and the not-too-sweet taste. When it comes to shortbread I'm forever experimenting (rice flour in place of cornstarch, etc.), but I'll make these again.
Makes approximately two dozen small cookies.
1 stick of butter (see my remarks above re: my preference for salted butter)
1 large handful of pine needles (see above)
1 1/4 cups all-purpose flour
3 tablespoons cornstarch
1/4 cup plus 1 tablespoon powdered sugar (icing sugar)
pine-smoked salt (see instructions above)
Put the pine needles and the butter in a small saucepan over low heat. Once the butter is melted, turn the burner off and allow the mixture to infuse for at least 30 minutes, preferably closer to an hour. Strain the needles out, pressing on them as you do to extract every bit of tree flavor, and chill the infused butter until shortly before you're ready to bake. (It will keep for a few days, tightly covered so as not to absorb other flavors from the refrigerator, and I'm sure it freezes as nicely as plain butter does).
Take the butter out to soften.
Combine the flour, cornstarch, and a pinch of the salt in a bowl. (If your salt is coarse, like my Maldon, crush it a bit as you're adding it). In another bowl, cream together the softened butter and the powdered sugar until they're thoroughly combined. Add the butter and sugar mixture to the flour mixture and stir (or mix with your hands) just until everything is combined and forms a crumbly dough. Pat it into a disk, cover it tightly with plastic wrap, and let it chill for approximately 15 minutes. (Any longer than that and it'll be hard to work with; you can chill it for longer, but if you do you'll want to take it out and let it come to temperature before proceeding).
Heat the oven to 325° F and line two baking sheets with parchment paper.
Cut two more sheets of parchment paper and use them to roll out your dough approximately 1/4" thick: one sheet on the counter, one between the dough and your rolling pin. Cut it into cookies with a cookie cutter or a sharp knife. Sprinkle the cookies with the smoked salt to taste, gently patting it down to help it adhere.
Bake the cookies for approximately 30 minutes, using the upper and lower oven racks and rotating the pans at the half-way point. (The original recipe calls for lowering the temperature to 250° F at this point and baking the cookies for an additional 15 minutes, but I rolled my cookies out slightly thinner and found they didn't need it). The cookies are done when they're just starting to brown. Gently transfer them to a rack to cool.
_______________


No comments:
Post a Comment