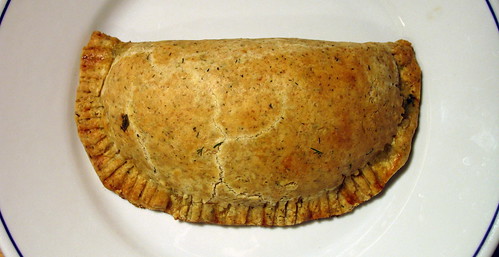
I have done a little research and I am still at a loss as to what to call these so let's just say they're pastries. In spirit they are close to a Cornish pasty — or pasties, plural — but the seam of those often runs along the top, not the side. The shape of my pastry more closely resembles that of an elongated Scottish Forfar bridie (here or here) but without its characteristic peepholes, or an obese empanda (particularly the Argentinian and Chilean incarnations, aquí o aquí).
The taxonomy gets even more complicated when we consider the contents. Pasties can hold just about anything but are traditionally made with meat. The Oxford Companion to Food (2nd ed). explains that "[c]ubed beef with root vegetables is now considered standard, but other meats or fish, or vegetables alone, were used," and quotes pasty authority Theodora FitzGibbon for a proverb about pasty innards: "'It is said in Cornwall that the Devil never crossed the River Tamar into that county for fear of the Cornish woman's habit of putting anything and everything into a pasty.'"
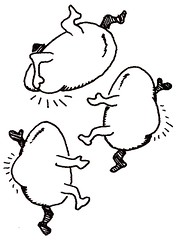
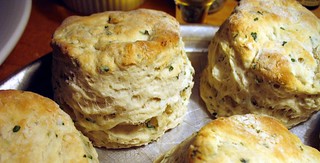
Despite what the Companion says, I have a feeling that if my all-vegetable pastries went masquerading as pasties in a shop window like this one, they might be called perfumed ponces and run away screaming:
The Companion, by the way, says pasties have "a seam of crimped pastry running the full length of the upper side," while the Cornish Pasty Association says they are "crimped on one side, never on top," because historically they were taken to work by miners, who could grasp their lunch by its sturdy seam-edge without washing their grubby hands, and simply toss its handle away when finished eating. (The pasties would presumably be too bottom heavy if the seam was on the top, causing the miners to dribble pasty innards all over their jumpsuits.)
The pasty has never caught on in the States, which might be a little strange considering how portable it is and how much Americans like to eat in their cars and at their desks. It's tidier than a burger — is that the problem, that it's too introverted for us? Too utilitarian? We have enough expats and curious Anglophiles to sustain the sale of proper pasties in New York City but they're very much a specialty item. Former NY Times restaurant critic William Grimes sneered at pasties in the late 1990s after tasting one in its native habitat and Cornwall sneered right back, but more recent pasty debate has centered around whether pasties are indeed Cornish or Devonian. A debate I would not wade into even with titanium wellies, so let's just move along to my recipe for pastries with an r.

You can prepare the vegetables or the dough for the crust a day or two ahead of time without any harm to the finished pastries, and there's quite a bit of flexibility regarding the greens. This recipe came about because I bought mild, young kale at the farmers' market and absentmindedly picked up some dandelion greens at the health food store the next day, but you could use one or the other, or spinach in place of either.
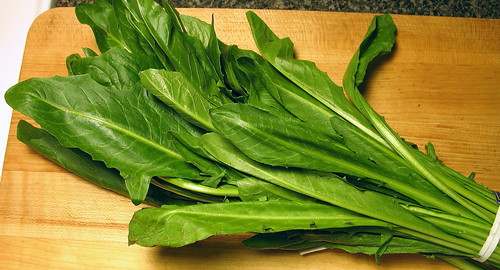
Likewise, I used green garlic because I had some that needed using up; you could easily leave it out, or substitute one or two cloves of ordinary mature garlic. I forgot to snap a photo of the green garlic shoots but there's an old one in my Flickr here; it's stinky stuff but the taste is fairly mild, and you can use between one and three shoots of it in this recipe. I washed and steamed all my greens the day before and ended up with slightly more than necessary to fill the pastries, but they're perfect for stirring into scrambled eggs or filling omelettes.

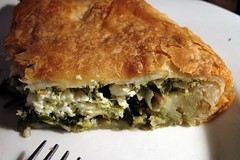
If you don't feel like making the pastry dough you could use filo instead, as I did for the pumpkin dinner I made for Halloween, or you could use frozen puff pastry. The very popular brand that sounds like Leper Midge Arms is made with partially hydrogenated vegetable shortening and high fructose corn syrup, so if avoiding that sort of thing is important to you look for this brand instead. Fresh Direct used to sell something comparable for a lot less money but they don't carry it any longer, so you'll have to empty your piggybank or pose for some very arty photos if you want to buy the good stuff. I'd bookmarked a recipe for a pot pie pastry that I wanted to try so I scaled it down with a brilliant gadget and used that. I made 4 big pastries; let me know how many you end up with if you make smaller ones.
pastry dough
2 1/4 cups (250g) all-purpose flour (I replaced 1/2 cup (60g) of it with whole wheat flour)
1 teaspoon salt
3 oz/85g chilled butter (I chop it into 1/2" cubes and put it into the coldest part of refrigerator the morning I intend to bake with it)
1/4 cup + 2 tablespoons (85g) chilled shortening
approximately 3 tablespoons finely chopped dill
approximately 5 tablespoons icy-cold water
Combine the flour, salt, and dill in a large bowl and cut in the butter and shortening with a pastry blender or 2 butter knives. Alternatively, you can use a food processor. When the butter and shortening are in small pea-sized pieces (and not a moment later), add enough icy-cold water to form a dough. Continue mixing with your hands (or pulsing the food processor) just long enough for it to hold a shape. Divide the dough into 4 relatively flat patties. Stack them with squares of wax or parchment paper in between, wrap them well in plastic wrap, and chill in the refrigerator until ready to bake. It's probably best to let the dough chill for at least 30 minutes even if you plan to bake right away; pastry dough can get tough if it doesn't have a chance to rest.
filling
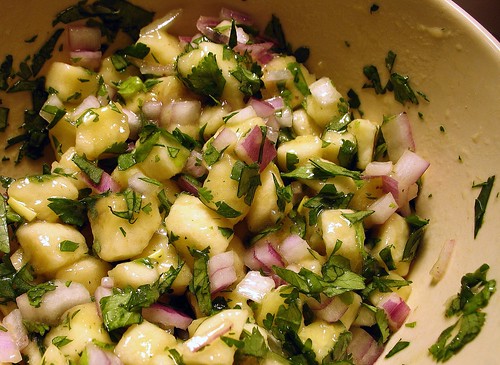
1 large bunch of kale, chopped into bite-sized pieces
1 medium bunch of dandelion greens, likewise
1 or 2 shoots of green garlic, everything but the frizzled ends finely sliced
1 big egg
approximately 1/4 cup finely chopped fresh mint and dill (preferably a mixture of both, although either one on its own would be fine)
approximately 1/2 cup crumbled feta cheese (I used a goats' milk feta from Consider Bardwell Farms, which I highly recommend if you can get it)
freshly ground black pepper
freshly grated nutmeg
also:
2 to 3 tablespoons milk, for brushing onto the dough before baking
Bring a large pot of salted water to a boil and cook the kale for 10 minutes. (I had young kale; if yours has tougher, older stems, cook them separately for 3 to 5 minutes before you add the leaves to the pot). At the 10-minute point, add the dandelion greens and cook for an additional 4 to 5 minutes. During the final minute of cooking, add the green garlic and give the pot a good stir. Drain the greens well and set them aside to cool.
When the greens are cool, lightly beat the egg in a large bowl and stir in the greens until they are thoroughly glossy with it. Stir in the crumbled cheese and season the mixture with the pepper and nutmeg. Feta often contributes enough saltiness on its own, but if your feta isn't salty then add a pinch of salt to the mixture to your taste.
Heat the oven to 375 F.
Roll out the four portions of dough so that each one is approximately 1/4-inch thick and 7 to 8 inches in diameter. Don't worry about the shape or size too much; as long as there is some sort of shape that can be folded in half after you spoon the filling on top, they'll turn out fine, and the edges will look far more presentable after you trim them. Scoop up a generous half-cup of the filling and evenly distribute it over one half of each portion of dough, not too close to the edges. (I was left with an extra 1/2 cup or so of the filling, which went into an egg white omelet the next morning). Fold the dough over the filling of each pastry, pressing down firmly around the edges to seal them, and trim any raggedy edges away. If there are any thin portions around the seams, use these trimmings to fatten them up. Press the end of a fork into the seams to make sure they are nicely sealed.
Transfer the assembled pastries to two baking sheets lined with parchment paper. Arrange them with the fattest parts turned outward and you'll be less likely to burn the edges. The parchment paper is not absolutely necessary but without it you will have to be vigilant about trimming away any sticky leaks while the pastries are still warm so that they don't stick to the pan. Of course you can use Silpats instead.
Bake the pastries 40 to 50 minutes, or until they are nicely browned. Rotate the pans mid-way through baking (and if you didn't use parchment paper, take a moment to trim away any filling that has leaked out at the seams). Let the pastries cool for at least 10 to 15 minutes before eating them. You can eat them at room temperature but they're nicest warm.